Convert a Blue pill to a Black Magic Probe


Introduction

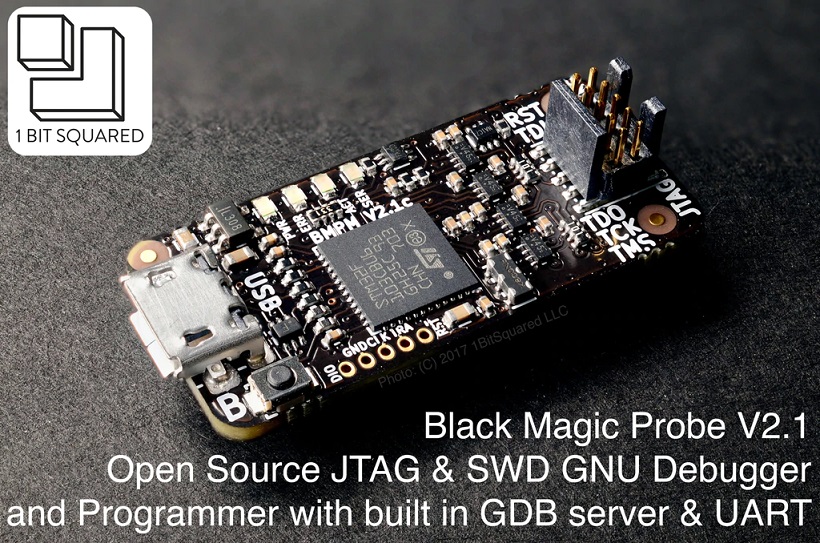
I was lookin for a cheap solution to debug SAMD21 microcontroller as they are more and more popular (next generation of Arduino boards), and as STM32 are pretty rare those times. I found a project called Black Magic Probe, which offer debugging capacity for all kind of ARM chips via SWD or JTAG (+ virtual COM port), but the probe is difficult to find in a webshop nowadays and in the same price range than the famous J-Link EDU probe (~60€ on RS/Farnell). Main advantage of this probe is that this one is open source, maintained, and can be flashed on a cheap "Blue pill" (~5€) even if you have clone.

In the next steps i will explain how you can flash a Blue Pill in order to obtain a "BMP".

Black Magic Probe

Pre-requisites

Here is what you will need in order to turn the Blue pill into a Black Magic Probe:

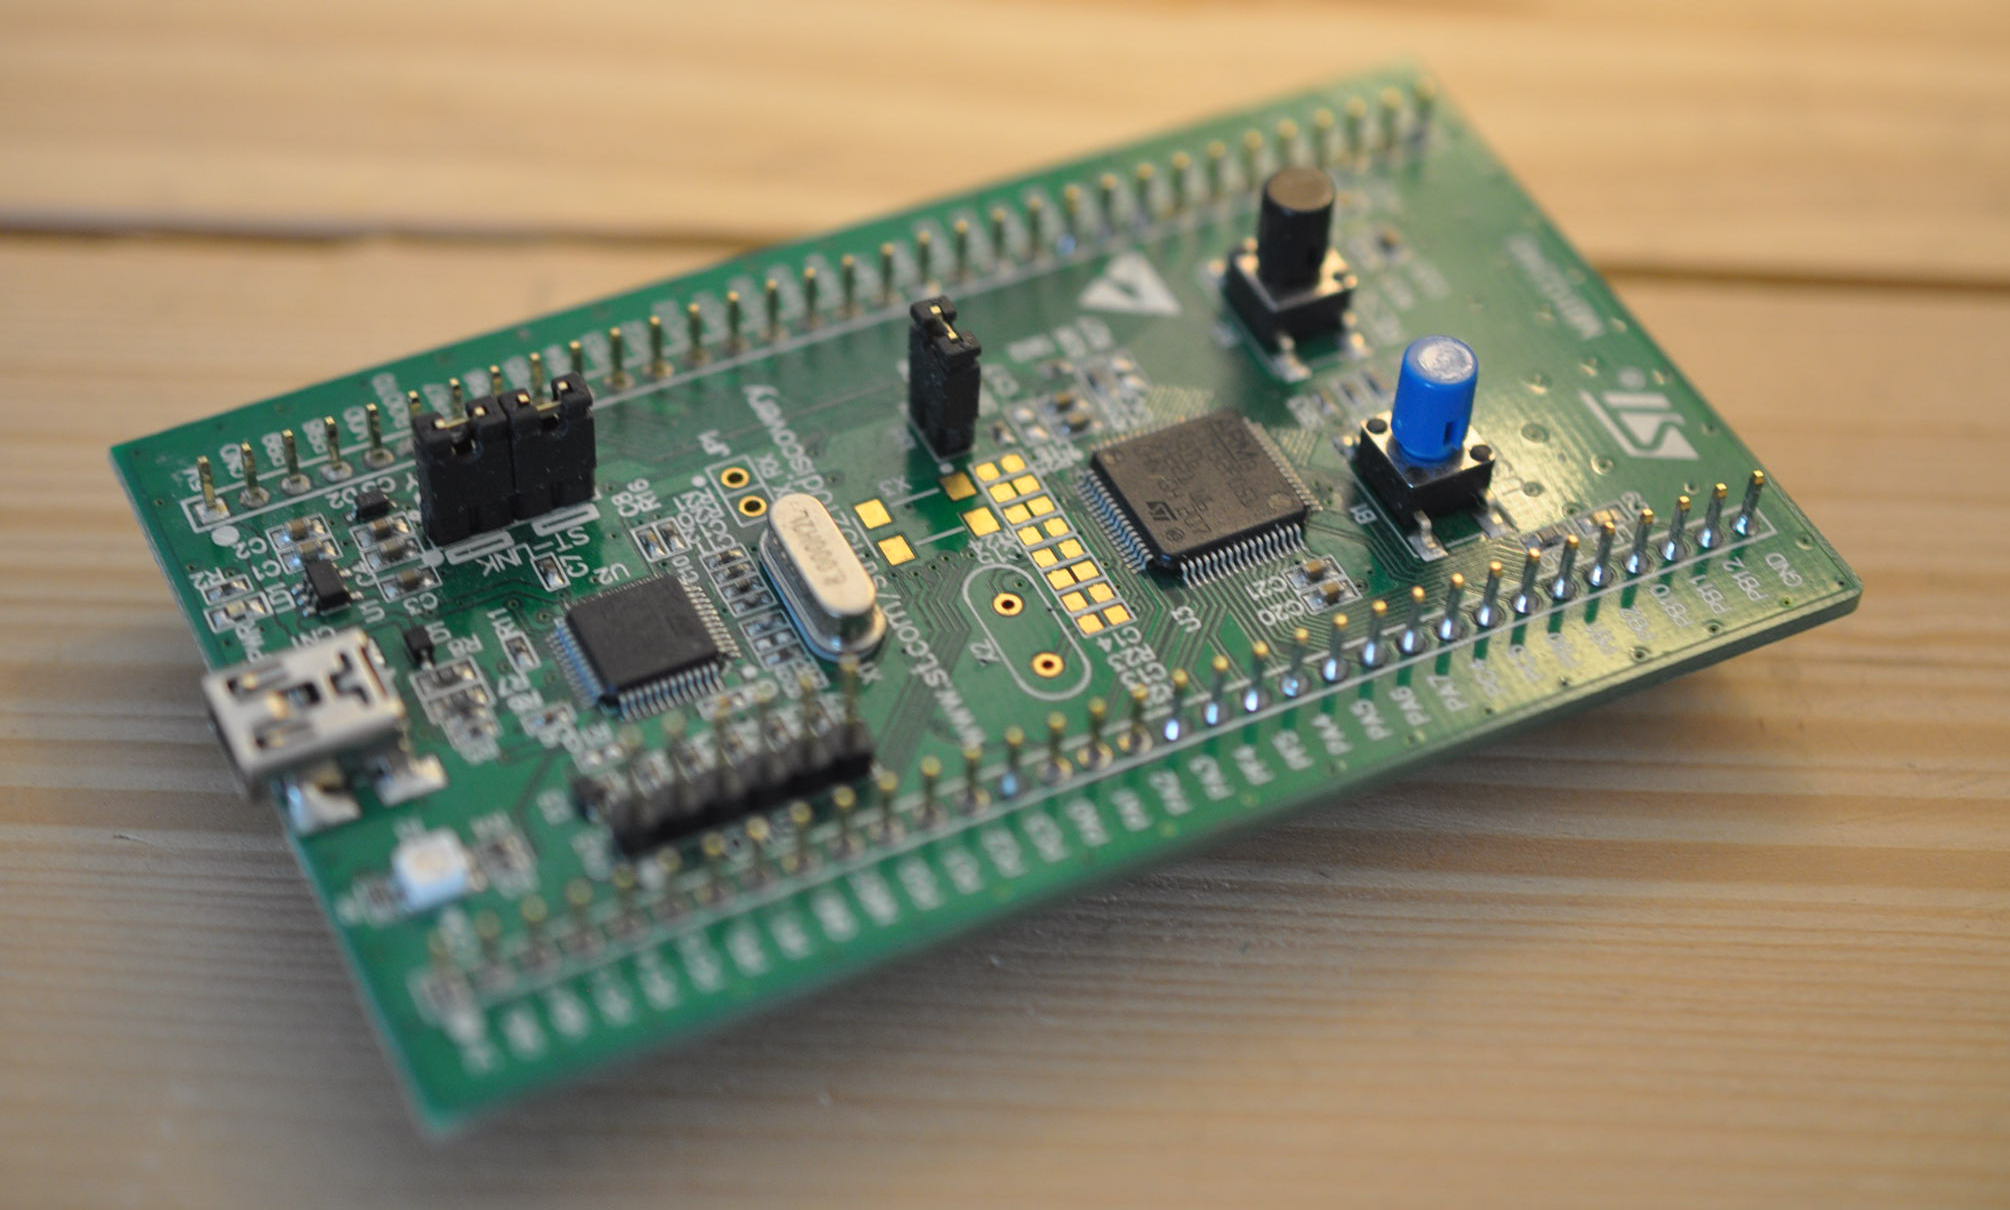
  • Blue pill (or a red/black one) with a STM32F103C8T6
  • STLink v2 (cheap clones are availables on eBay or Aliexpress)
  • Jumper wires Female/Female (x4)

Note: If you dont have a STLink, you could follow another How-to which use a USB to Serial converter [1] or if you have a useless STLink clone, this one could be reflashed as a Black Magic Probe [2].

For the software part you will need the two binary files attached below:

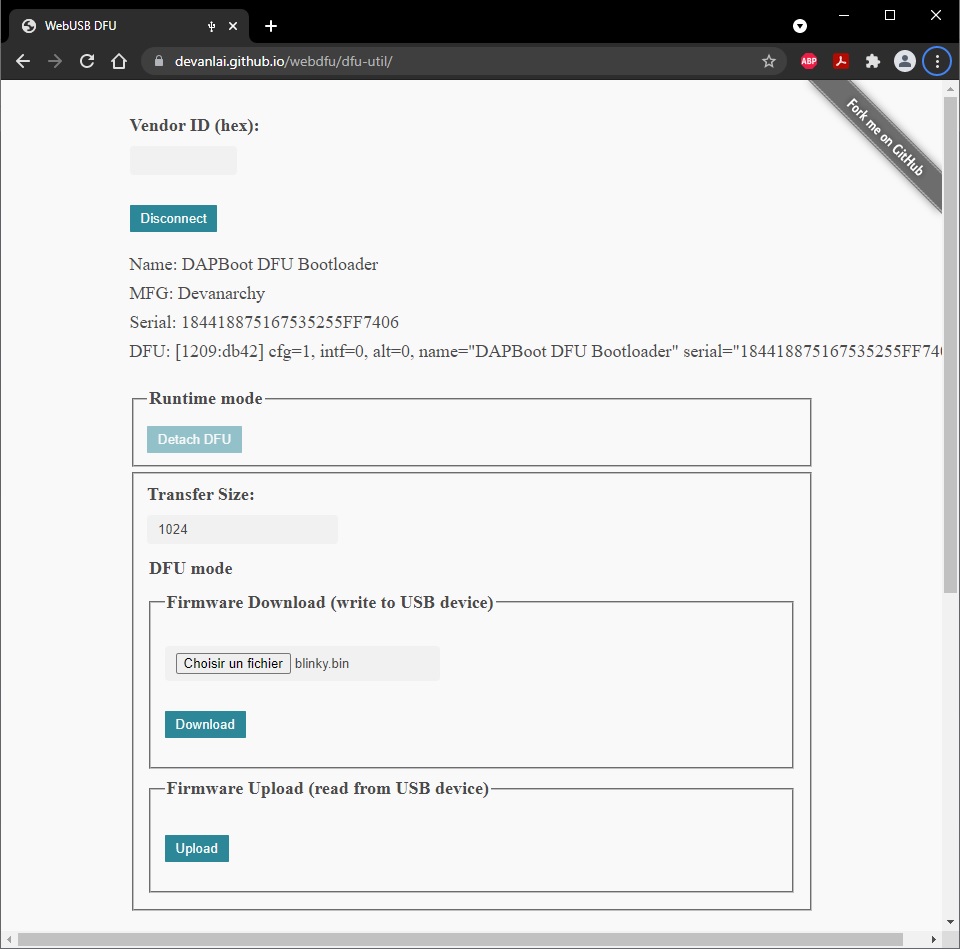
Note: even if it's not the latest version available it could be updated later via dfu.

TODO: explain how to get/build latest version.
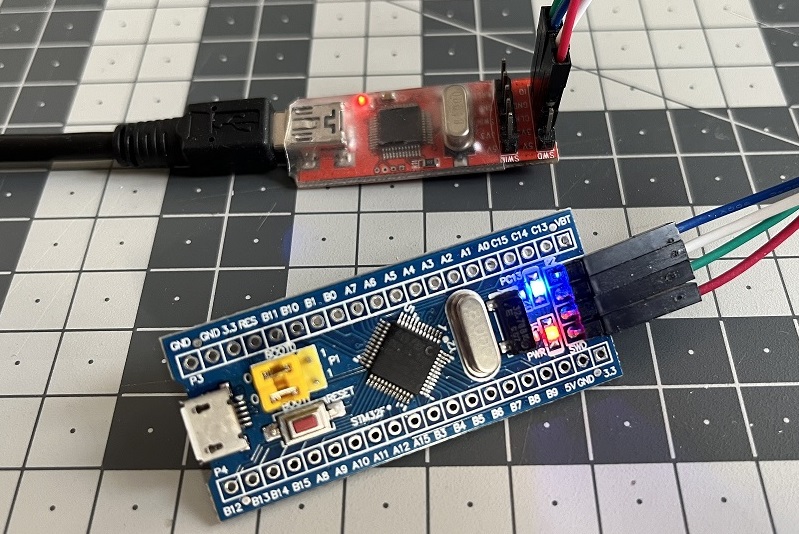
Wiring

No mystery here, we have to use the four pins availables (SWD + 3V3 + GND) on the Blue pill, and connect it to the STLink.
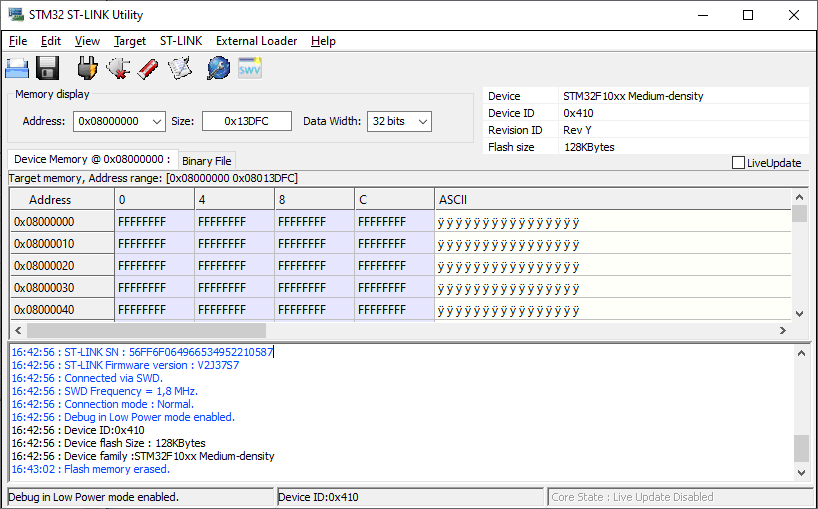
Some difficult wiring

Flashing

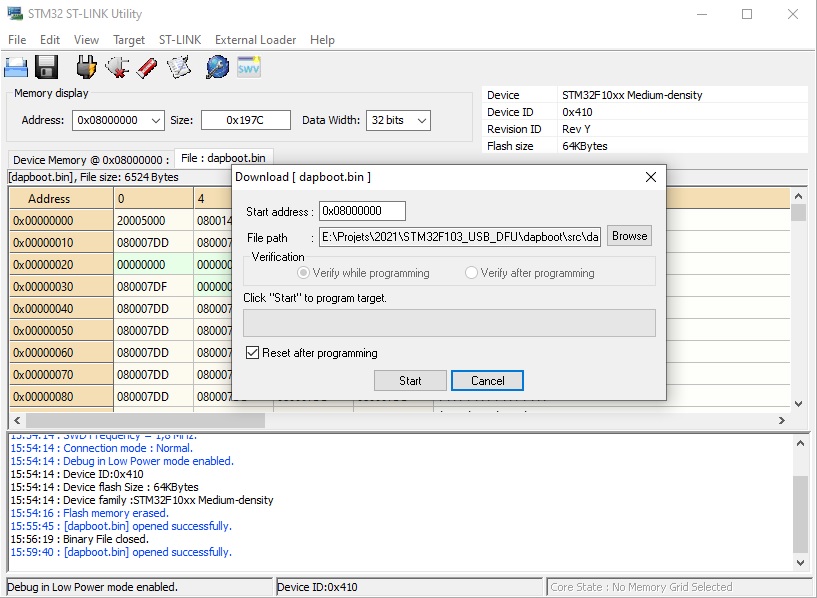
Open STLink utility, click on "Connect to the target" in order to see if the STLink is recognized and could access to STM32F103 memory.

Connection to STM32F103

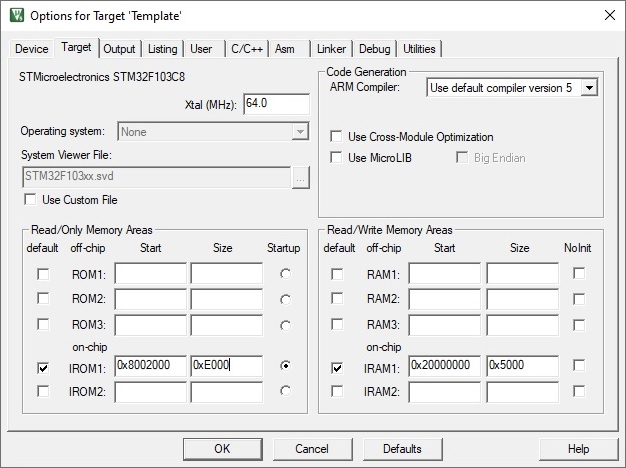
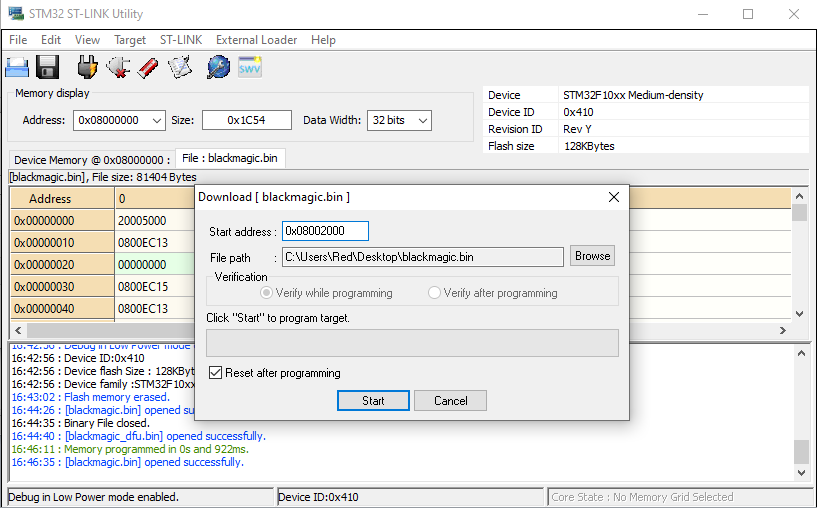
Next, go to "Target", "Program...", select the binary blakcmagic_dfu.bin, set the start address 0x08000000 and click on Start (after the flashing, a reset occur and LED on Blue pill should blink).

Black magic DFU binary flashing

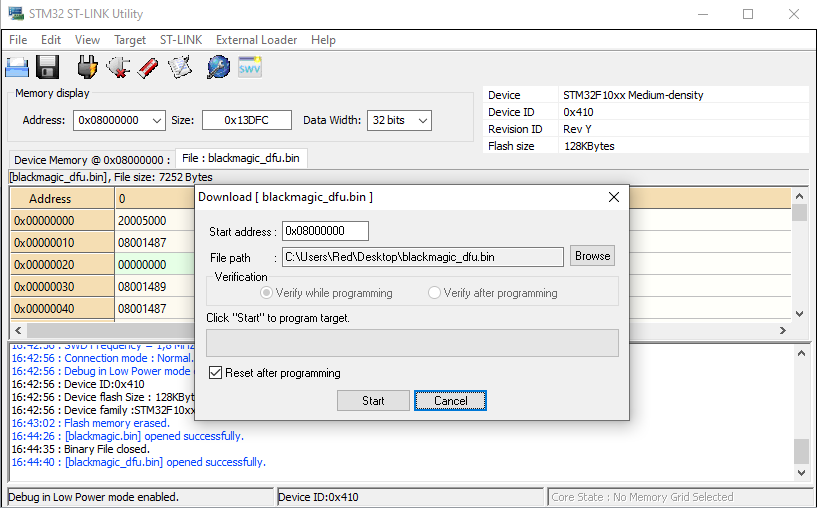
Same thing for blackmagic.bin but the start address is 0x08002000.

Black magic binary flashing

Test (Smoky!)

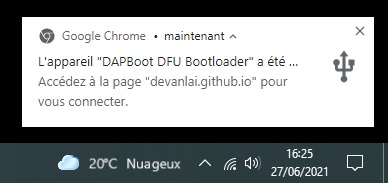
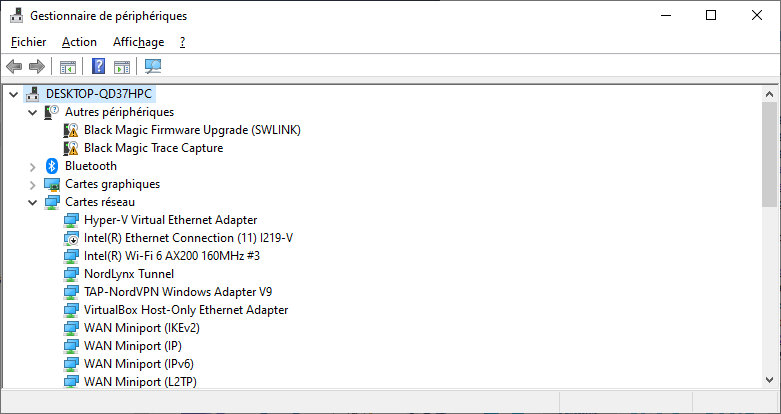
Once done, remove jumper wires and plug the blue pill to the computer (via the micro USB port), the board will be recognized as a Black Magic Probe 1.6X.

If you look at the peripheral manager, two devices should appear.

Black magic binary flashing

Well done, and thanks to the Black Magic Probe authors, now you can use your Blue pill in order to debug almost any ARM chips. SWD pins are the same than the ones used in order to flash it. JTAG is available on PA13 (JTMS), PA14 (JTCK), PA15 (JTDI) and PB3 (JTDO), see this readme.md for more details.

A next post will explain how to use this Black Magic Probe with Visual Studio code (and the well known Platform.io extension) on a SAMD21.

References

Acknowledgments to Black Magic team and peoples who are sharing their knowledges.

[1] blackmagic Public - In application debugger for ARM Cortex microcontrollers.

[2] Converting an STM32F103 board to a Black Magic Probe.

[3] JeeLabs - Black Magic Probe.

[4] Black magic probe out of cheap STLink programmers (nice pics!).

[5] JTAG/SWD debugging via Black Magic Probe on an STM32 blue pill.


Firmware upgrade on a STM32F103 via USB (DFU)


Introduction

When devices are on field, users should be able to update it without debugger, and this is why some bootloader are integrated. A bootloader allow reflashing over all kinds of communication bus (UART, CAN, USB, ...).

Here we will focus on a bootloader (dapboot) which will permit to reflash a firwmware over USB via the DFU protocol (Device Firmware Upgrade, see [1], [2]) on a "blue pill" (STM32F103).

STM32F103 blue pill

Build the bootloader

Sources are availables at https://github.com/devanlai/dapboot and could be obtained with the command:

git clone https://github.com/devanlai/dapboot.git

Once the project downloaded, create a local.mk in /src with the content below:

TARGET ?= BLUEPILL

# Enable button for bootloader entry after reset
DEFS += -DHAVE_BUTTON=1
#DEFS += -DBUTTON_ACTIVE_HIGH=1
#DEFS += -DBUTTON_GPIO_PORT=GPIOB
#DEFS += -DBUTTON_GPIO_PIN=GPIO2

The step above is optional, but it will permit to switch in bootloader after a reset when BOOT1 pin (yellow jumper) is set HIGH.

Next we can build the bootloader:

cd dapboot/src
make clean
make

Build operation will provide a file named "dapboot.bin" which will be used on the blue pill.

Flash the bootloader

In pre-requisite of this step you will need to install STM32 ST-LINK Utility, and connect an ST-Link V2 (or a cheap clone for few bucks on Ebay, Aliexpress, ...) to your Blue pill.

STM32F103 blue pill with ST-Link

Once connections are OK, open STM32 ST-LINK Utility, select "Connect to target", then perform a "Full chip erase", and go to "Target" > "Program..."

Bootloader flashing via STM32 ST-Link

Select the dapboot.bin via "Browse", and trigger the flashing by pressing "Start".

When the flashing is done you can remove the ST-Link probe.

Test the firmware upgrade

Dapboot bootloader is flashed and running, so you can connect a usb cable to the micro usb connector of the blue pill.

Windows will detect the device, and if your web browser is running a popup will appear which propose to go to https://devanlai.github.io/webdfu/dfu-util/.

Web DFU interface

The web interface permit to flash any binary via DFU from your browser.

Web DFU interface

  1. Select "Connect", choose "Dapboot DFU bootloader".
  2. Go to "Firmware download" box, select the blinky.bin (software built on my side which toggle the LED on PC13 each second).
  3. Select "Download".

A progress bar will appear, and if the download is successful, bootloader will reset the MCU and execute the Blinky software.

Important! if you want to return in DFU mode, set the BOOT1 input to HIGH via the yellow jumper and press the reset button.

Build the firmware

As the dapboot bootloader is located in the first 8kB of flash memory, the start address of our firmware/application should be moved of 8kB (0x2000), which lead to the start address 0x8002000 for the STM32F103C8T6 present on the blue pill.

If you are using Keil MDK-ARM for development, here is how to proceed:

  1. Go to "Project" > "Options for target ...".
  2. In the "Target" tab, set the start address to 0x8002000 and the size to 0xE000.
  3. Keil flash range update

  4. Go to "Output" tab and verify that "Create HEX" file is checked.
  5. Close the "Options for target" window and build your application.

The output file generated by Keil is not suited for the DFU Web interface, a conversion Hex to Bin is required (see TODO)

When the file is converted to .bin, you can follow the same step than in "Test the firmware upgrade" section, but this time you will need to set the BOOT1 input to HIGH via the yellow jumper and press the reset button.


Cygwin install and GCC ARM embedded toolchain


Install Cygwin

Get the Cygwin installer from cygwin.com/install.html (mirror), open a prompt and install cygwin with the following packages:

setup-x86_64.exe -q -P autoconf,autoconf2.5,autogen,automake,automake1.15,libtool,make,gcc-g++,mingw64-x86_64-gcc-core,mingw64-x86_64-gcc-g++,python37,python37-devel,python3-configobj,wget,zlib-devel,git,chere

If some packages that you usually used are missing and you don't know the exact name, please start again the installer and search for packages.

Responsive image

Once installed, start Cygwin as admin and enter the command below:

chere -i -t mintty -s bash

It will permit to start Cygwin direclty from a specific folder, with the famous "bash prompt here".

Responsive image

Install GCC ARM embedded toolchain

Now that Cygwin is installed, we can focus on the GCC ARM Embedded toolchain, which can found here (mirror).
Start the installer, select a path WITHOUT SPACES and continue the install process.

Responsive image

Import GCC ARM embedded toolchain to Cygwin

The ARM toolchain can now be added to Cygwin by editing the bash.rc file located in Cygwin directory (example: C:\cygwin64\home\Red).

Responsive image

Check if the toolchain is available and we are done:

Responsive image

Real-Life Test

Get a project like dapboot and start a build:

git clone https://github.com/devanlai/dapboot.git
cd dapboot/src
make

Responsive image

If everything went well, the output should be similar to the one above.


Disable hibernate and reduce virtual memory [Windows]


After a fresh install of Windows on a SSD, here is some tips which permit to earn some disk space and permit to not voids the warranty.

First, disable the hibernate mode (by using the command prompt) :

powercfg -h off
        

Next, reduce or disable the virtual memory (which is equal to your amount of RAM !) by following these steps.

These two tips permit to free up a lot of drive space (20GB on my configuration !).


Add an extension to PHP [WampServer]


For an ongoing project, i need to add an extension (timezonedb) to PHP. The First thing to do, is to get the extension already built (.dll), in my case i use this link and i choose the one which match with my configuration (PHP 5.5, Thread Safety enabled, 32bits x86). You can find your configuration with phpinfo(). Once this step done, you have to paste this file in the right repertory:

C:\wamp\bin\php\php5.5.12\ext

Next, we have to add this extension to the php.ini file, which can be found in:

C:\wamp\bin\apache\apache2.4.9\bin

Example (php_timezonedb.dll):

...
;extension=php_pdo_odbc.dll
;extension=php_pdo_pgsql.dll
extension=php_pdo_sqlite.dll
;extension=php_pgsql.dll
extension=php_shmop.dll
extension=php_timezonedb.dll
...

Next start/restart Wampserver and you can see the addition of your extension with a phpinfo() or in WampServer menu (PHP > PHP extensions).


Bad redirection [WampServer]


When you have just installed WampServer and start a new project (/www repertory), the project can be reach by use this kind of URL localhost/myProject. But, with newer version of WampServer, localhost redirection is removed. So, in order to fix it quickly, we have to modify the index.php file:

C:\wamp\www\index.php

and change value of $suppress_localhost to false.

$suppress_localhost = false;

Round a number to the nearest value [C]


This method is known as round to nearest via modulus division, and permit to round to the nearest multiple of the number.

int round(int number, int multiple)
{
	int half = multiple/ 2;
	int result = 0;
	
	if(number < 0) half = -half;
	
	result = ((number + half) - ((number + half) % multiple));
	
	return result;
}

Examples:

round(63, 4)
>> 64

round(61, 4)
>> 60

round(8, 10)
>> 10

round(2, 10)
>> 0

Thanks to Gavin Kistner.


Links


Debian repository on Raspbian


On a Rasberry Pi 2, if you need packages which is not includes inside Raspbian repository, you can use debian repository (Wheezy for now).

Use these command lines to add Debian Wheezy repository

echo "deb http://ftp.debian.org/debian/ wheezy main" > backports.list
echo "deb http://ftp.debian.org/debian/ wheezy-backports main" >> backports.list
sudo mv backports.list /etc/apt/sources.list.d

When it’s done, try to make a sudo apt-get update. Usually, you can see that APT need to register the new repositories and request to add public keys.

First install a list of key server,

sudo apt-get install debian-keyring

Next register the keys provide by APT (replace the key 8B48AD6246925553 by yours),

gpg --recv-key 8B48AD6246925553
gpg -a --export 8B48AD6246925553 | sudo apt-key add -

and then update your packages list,

sudo apt-get update

Note: If you need a package in a specific repository used this kind of command

sudo apt-get install -t wheezy-backports gstreamer1.0*

STM32F0 Libraries [mbed like]


Some applications doesn’t require powerful microcontroller, and most of times the examples give by the constructor are more complicated than the application wanted. These libraries are the result of a basic need, which is to design an application with few lines of code like the rock star mbed !

These libraries are available on GitHub, and can be easily used under Keil (free version limit code to 20k). The most of the stm32f051 peripherals are availables (GPIO, ADC, USART, SPI, I2C, DAC) with examples and work with the discovery kit. « How to » are availables soon !

Edit: Theses libraries are available for F2 and F4 !


Remove Unity [Ubuntu 14.04]


If you want to come back to the « old » desktop in ubuntu, just install GNOME classic, with this command line:

sudo apt-get install gnome-session-fallback

Once, this is done, close the session, click on the gear icon near the user name and select gnome compiz or metacity. Open your session and voila !


How to daemonize a program [Linux]


On Linux, there are « two » way to daemonize a program. The old way which is the most standard and can be applied to every distributions, with using start-stop-daemon. And a more recent way using Upstart which is a replacement for System V init, available on Ubuntu, and which provide a lot of interesting features (like respawn and events).

First method: start-stop-daemon

Open a text editor.

nano /home/user/myService

Then, paste this code and adapt if for your needs, by modifying these four fields, DAEMON, DEAMON_OPT, DAEMON_USER and DEAMON_NAME.

#! /bin/sh -e

DAEMON="/programDirectory/myProgram" # Program command line
DEAMON_OPT="-n -d"  # Command line arguments (options)
DAEMONUSER="user" # Program user
DEAMON_NAME="myProgram" #Program name (Same as the executable)

PATH="/sbin:/bin:/usr/sbin:/usr/bin"

test -x $DAEMON || exit 0

. /lib/lsb/init-functions

d_start () {
        log_daemon_msg "Starting system $DEAMON_NAME Daemon"
 start-stop-daemon --background --name $DEAMON_NAME --start --quiet --chuid $DAEMONUSER --exec $DAEMON -- $DEAMON_OPT
        log_end_msg $?
}

d_stop () {
        log_daemon_msg "Stopping system $DEAMON_NAME Daemon"
        start-stop-daemon --name $DEAMON_NAME --stop --retry 5 --quiet --name $DEAMON_NAME
 log_end_msg $?
}

case "$1" in

        start|stop)
                d_${1}
                ;;

        restart|reload|force-reload)
                        d_stop
                        d_start
                ;;

        force-stop)
               d_stop
                killall -q $DEAMON_NAME || true
                sleep 2
                killall -q -9 $DEAMON_NAME || true
                ;;

        status)
                status_of_proc "$DEAMON_NAME" "$DAEMON" "system-wide $DEAMON_NAME" && exit 0 || exit $?
                ;;
        *)
                echo "Usage: /etc/init.d/$DEAMON_NAME {start|stop|force-stop|restart|reload|force-reload|status}"
                exit 1
                ;;
esac
exit 0

Once done, save it, and copy it in the init.d directory.

sudo cp /home/user/myService /etc/init.d/

Then change the access permissions.

sudo chmod +x /etc/init.d/myService

That’s all !

We can test our service (daemon) by using manually commands (start, stop or restart).

sudo /etc/init.d/myService start
* Starting system myProgram Daemon
sudo /etc/init.d/myService stop
* Stopping system myProgram Daemon

If you want to launch your service at startup, you have just to create some init scripts by using this command.

sudo update-rc.d myService defaults
 Adding system startup for /etc/init.d/myService ...
   /etc/rc0.d/K20myService -> ../init.d/myService 
   /etc/rc1.d/K20myService -> ../init.d/myService
   /etc/rc6.d/K20myService -> ../init.d/myService
   /etc/rc2.d/S20myService -> ../init.d/myService
   /etc/rc3.d/S20myService -> ../init.d/myService
   /etc/rc4.d/S20myService -> ../init.d/myService
   /etc/rc5.d/S20myService -> ../init.d/myService

Second method: Upstart

In order to prevent any access permissions problems we use a copy of an existing script, the most common is rcS.conf.

sudo cp /etc/init/rcS.conf /etc/init/myService.conf

Then open it,

sudo nano /etc/init/myService.conf

and replace all the code by this skeleton.

# Upstart script skeleton
description "myService daemon"
author "Name Firstname name.firstname[at]domain.com"

# Launch the service at boot
start on runlevel [2345]

script
# Launch the program
exec /home/user/programDirectory/myProgram
end script

# Relaunch the program if it die
respawn

# Relaunch forever
respawn limit unlimited

Adapt the program path, save it, that’s all !

The service can be start or stop manually with these commands.

sudo start myService
 myService start/running, process 1972

sudo stop myService
 myService stop/waiting

If you want to know the status of your service just run this.

initctl list | grep myService

Note: by default the standard outputs stream (stdout and stderr) of the program are put in a log file which have the name of the service and situate in:

/var/log/upstart/myService.log

RS-485 RTS hardware control [Windows]


Responsive image

If you want to use the serial port for RS-485 communication, you will need to configure it. Under windows the configuration is pretty easy, just use,

.fRtsControl=RTS_CONTROL_TOGGLE;

Note: RTS hardware control work only on real serial port! The most of USB to serial converter (Prolific chip) don’t implement it, except FTDI chips. If you need to communicate in RS-485 over an usb port, use the USB/RS485 converter cable from FTDI which automatically generate RTS!


Serial to TCPIP – Multi clients [Linux]


Two weeks ago, i needed to find a way to send/receive serial data over ethernet using TCP/IP protocol, with multi clients support under Linux. All clients can send datas to the serial port, and data from the serial port are send to every clients.

In my investigation i found a lot of softwares (socat, ser2net, …) which permit that, but most of them are limited to one client, except the famous netcat !
First install it:

sudo apt-get install netcat

Configure the serial port (8 databits | 115200 bps | no parity | 1 stopbits):

stty -F /dev/ttyUSB0 cs8 115200 -parenb -cstopb

Launch ncat (listen on port 8060):

ncat --listen --keep-open --source-port 8060 < /dev/ttyUSB0 > /dev/ttyUSB0

That’s all ! You can test your serial port to tcpip gateway by using any tcp clients, like netcat or Hercules (HW-group).

Extra: If you want to dump transiting data, into a file, just add « –output file.log » or « –hex-dump file.log » if you want data in hexadecimal.


Serial Port Library [Windows/Linux]


In many projects we need to communicate with external equipment, and the « most » of time this communication is done, through a serial port. In order to reduce development time or make easier the prototyping step, i have decided to write my own serial port library and share it with the universe.

An exemple of use, where all data received are transmitted,

#include <stdio.h>
#include "../inc/serial.h"

// Create serial port
serial serial;

int main(int argc, char** argv)
{
 char buffer[256] = {0};
 int length = 0;
 
 // Open serial port ("COM3", "/dev/ttyUSB0")
 serial.Open("COM3", 9600, 8, NO, 1);
 
 while(1)
 {
  // Wait character(s)
  length = serial.Read(buffer);
  
  if(length)
  {  
   // Send data
   serial.Write(buffer, length);
  }
 }
 
 // Close serial port
 serial.Close();
 
 return 0;
}

The read() method is non blocking and return the number of received data.

This library is available here. I used Orwell Dev-C++ under Windows and a basic text editor under Linux.


Syntax


function foo()
{
   if (counter <= 10)
      return;
      // it works!
}